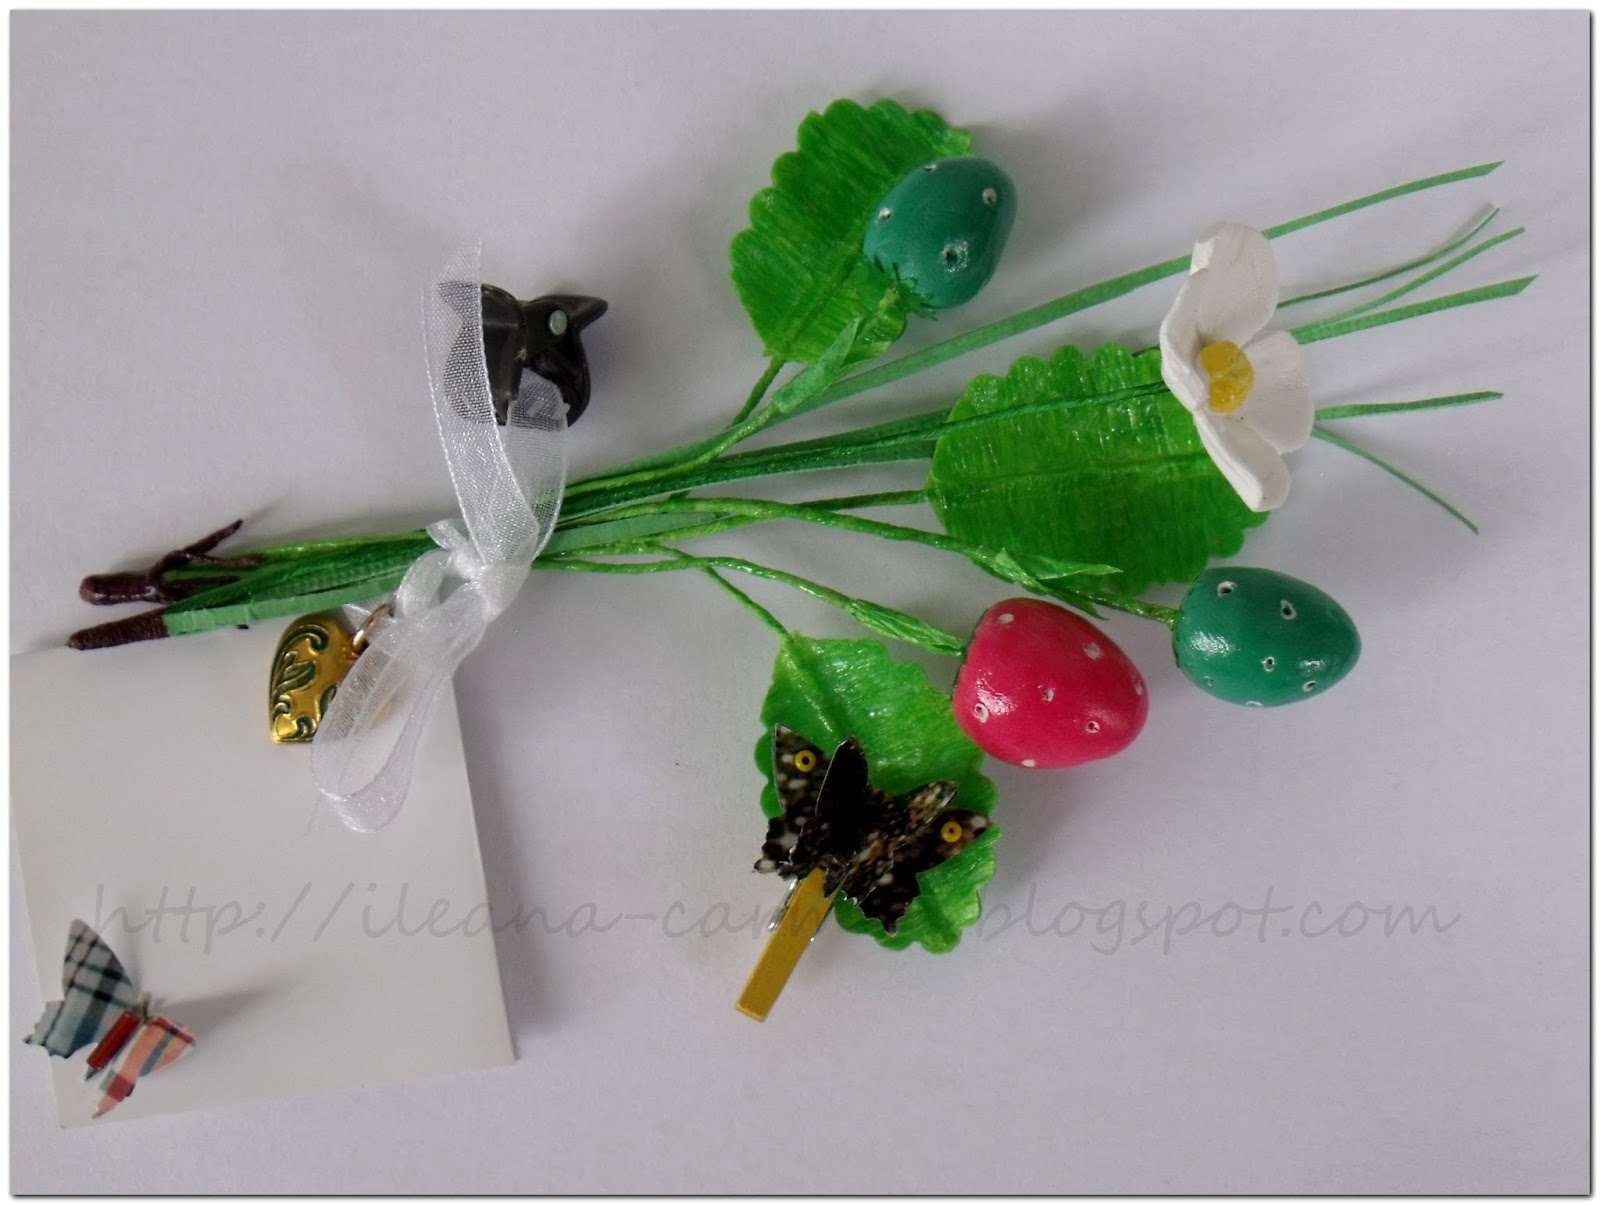
Maces (rosa canina)
din pasta de modelaj si hartie creponata


Specificatii tehnice lucrare
Crengutele cu macese au aproximativ 15 - 20 cm lungime.
Materiale necesare:
- pasta de modelaj de culoare verde si rosie
- lac pentru pasta de modelaj
- sarma
- aracet
- oja
de unghii de culoare neagra si verde
- lac de unghii transparent
- mini carlige de culoare verde si rosie
- pamblici
de culoare verde si rosie
- hartie
cartonata de culoare alba
- hartie
creponata de culoare verde
- margele de culoare neagra si verde
Unelte necesare:
Unelte necesare:
-perforator
normal
-foarfeca
-cutter
-rigla
metalica
-unelte
specifice pentru modelaj pentru pasta de modelaj
Etapele lucrarii:

Se strapung apoi macesele cu o bucata de sarma, groasa de 0.5mm si lunga de aproximativ 15-20 cm.
La capatul superior al macesei se lipeste o margica.
Se
lasa apoi la uscat cateva ore dupa care se dau cu lac specific pentru pasta de modelaj sau cu lac transparent de unghii.
Capatul sarmei, daca se vede dupa ce am lipit margica, se da cu putina oja de unghii de culoarea margelei.

Se infasoara apoi sarma cu hartie creponata de culoare
verde si la capat se lipeste cu putin aracet.


O
frunza de macese se realizeaza din doua bucati dreptunghiulare de hartie
creponata verde lipite pe ambele parti ale unei codite.
Dupa
lipire, se dau dreptunghiurile de hartie cu oja transparenta pentru a putea fi taiate, dupa
uscare, la forma de frunza.

Se asambleaza impreuna, pentru o crenguta, cate cinci frunze pe o sarma mai lunga.

Pentru
realizarea unei crengute cu macese sunt necesare:
- cinci macese cu codita
- o
frunza asamblata care se leaga impreuna cu hartie creponata de culoare verde, lipita la capat cu aracet.
Toata crenguta se da apoi cu lac de unghii transparent.

La o crenguta cu macese se poate atasa, cu ajutorul unor pamblici de culoare rosie si verde, un cartonas pentru a scrie pe el cateva randuri.
Crenguta se poate atasa unui cadou cu ajutorul unui mini carlig asortat si el la culorile crengutei cu macese.


-
This project,
TUTORIAL - MIXED: ROSEHIP from Polymer Clay and Crepe Paper,
will be entered in the following challanges:
-
This project,
TUTORIAL - MIXED: ROSEHIP from Polymer Clay and Crepe Paper,
will be entered in the following Link Parties:
- What's It Wednesday #186 - ivy and elephants
- Handmade Hangout Partyy #68
- It's a Party! #23
- It's time for the weekly Sundays Down Under Linky Party {17}
- the chicken chick - clever chicks
blog hop #158 with chubby - Make it Pretty Monday - Week 152
- What's It Wednesday #187

va rog sa specificati sursa tutorialului.
Va multumesc.
-
-
If you are using my tutorial in your projects,
please specify the source of the tutorial.
Thank you.


Oh wow these are amazing ! Lovely tutorial as well !
RăspundețiȘtergereThanks for playing with us at BGC
Thank you for visiting me.
ȘtergereBeautiful and handmade. !!
RăspundețiȘtergereThank you Mary.
ȘtergereCe bine ti-au iesit :D!!
RăspundețiȘtergereMi-ai amintit cand mergeam in copilarie sa culegem macese ;))))
They look beautifully! thank you for tutorial.
RăspundețiȘtergereThank you for playing with us at BGC this month!
Greetings, Aneta
Thank you for visiting me.
Ștergere